


Ancient notes from the knight Galthen, written specifically about disturbing events in and around the then young enclave of Bounac. A particularly long and detailed passage deals with the disappearance of a woman. Presumably due to a curse. The disappearance and heritage of the woman in great length with every clue known to Galthen at the time being meticulously recorded by the knight himself.

Adventures of Galthen Quest
Kesar the Younger's wife, Yselda, has been taken from him. Will you help him investigate the dark forces that took part in this malicious play?
Location
Reward
Dangers
17


History
The quest was originally launched with just the Galthen and the Lost Queen mission. With the Winter Update 2022 the Galthen and the City of Gold mission was released. Furthermore, for the Winter Update 2023, the questline was further extended with Galthen and the City of Gold Part II.
Requirements
- Galthen and the Lost Queen
- Completed The Order of the Lion Quest (level 250 is required);
- 20x Carnisylvan Fingers;
- 10x
 Carnisylvan Barks;
 - 2x
 Human Teeth;
Note that completing the above is not required to start the following missions:
Galthen and the Lost Queen

Kesar the Younger
Go to Bounac and talk to Kesar the Younger.
Remember he only appears in the throne room when it's day in Tibia.
Ask him about Yselda. He'll tell you to look for the help of a seer.
Lesh the Seer
Find Lesh the Seer in Bounac, here. Ask him about Yselda.
Yselda's Curse
Go to Edron's Magic Academy and talk to Spectulus, again, ask about Yselda and say yes. He will tell you about Yselda's Curse and instruct you to follow Galthen's steps in Bounac.
Lost Satchel
On the southern part of Bounac, walk west to a house where you'll find An Idol, here. Use the ritual notes on the floor in front of it to receive a message:
Staring at the writing you begin to decipher a letter. Then another and another. The symbols seem to wriggle and move: VBOX
Greet An Idol saying VBOX ('Death' in Jekhr) and you'll be teleported to a small cave. Inside it, just walk south until you find a dead tree and use it to obtain Galthen's Satchel  with an Artefact Box
  and a Parchment
  with the text shown to the right. You'll be automatically teleported out after some seconds.


Note: You can obtain new Galthen's Satchels from the dead tree every 30 days.
Ritual Words
To the north-east of An Idol, find Innkeeper Alphonse and ask him about Galthen and say yes to all his questions. You'll receive Ritual Notes  .
.
Bounacean Lion
Return to Kesar and report your progress using the keyword Yselda.
You'll now have access to the Bounacean Lion, a place infested with Crypt Warrior. Go past the gate hereto enter the dungeon. Go down the stairs, then south-west and down again. Go around the cave to reach the Sulphur Pool shown to the right, where you'll be teleported.

Trees of Life
You're now in the Forest of Life. Find the Soup Kettle on the lowest floor all the way to the south-east, here. You'll need the following ingredients to prepare a soup:
Use all of them on the Kettle and then use the Kettle.


Megasylvan Yselda

Adventures of Galthen - Yselda
Killing Megasylvan Yselda using the simple method.
You'll be able to fight Megasylvan Yselda now. From the Kettle, go to the big room nearby and levitate up the ramp. Go south and walk near the trees to be teleported to a small room. You can fight Yselda with a team of up to 5 players. To make her vulnerable, say the words DEMIHBOULDR, SOMMBHA and WITHER in the NPC or Local Chat.
There are two possible ends to this fight. If you simply kill Yselda and let any of her Megasylvan Saplings die (there's four in total, one in each corner), you'll still be able to complete part of the quest. To go even further, however, you need to keep her four Megasylvan Saplings alive the entire fight.

Adventures of Galthen - Yselda 2
Killing Megasylvan Yselda using the healing method.
The Saplings can be healed by players. The recommended strategy is to have a full team of 5 players with as many mages as possible. All players should have at least 100 Ultimate Healing Runes each. The Saplings constantly take 1000 damage during most of the fight, so they must be healed non-stop. Organize your team so the best healing power (mages) is focused on the south saplings, while others take turns between attacking and healing the northern saplings. Nevertheless, it's important that all players attack Yselda a few turns so they also get participation and loot.
Either way, after the fight say hi to Yselda in NPC form. The dialog will vary depending on the method you used to defeat her. You will receive the achievement Woodcarver. Leave the boss room through the (somewhat hidden) teleport to the south.
From now on, you can use a shortcut between the Forest and the Surface. The shortcut is located one floor up the exit of Yselda's lair, here.
Return to the surface and report your findings to Kesar the Younger to receive the Royal Bounacean Advisor Outfit. If you have defeated Megasylvan Yselda while protecting her Saplings, you'll also receive a Violet Tulip  and the permission to talk to John (Bounac), which will give you the first addon of the outfit.
Galthen and the City of Gold


Discovering Iksupan
Galthen has also explored an ancient lost city called Iksupan. To follow his steps, start by going to Tiquanda and walking close to the Writ at the ruins on the location shown on the map. You'll get the message "A sign reads: 'Sealed by the Inquisition at official behest of Chaplain Sandomo'" and a quest log update.

The Key Intihuatac
The writ will lead you to Sandomo, an NPC in Roshamuul at The Inquisition's camp, here. Ask him about the door, and then follow the conversation by saying yes, grandfather, key, and diary. You'll receive a Piece of an Ancient Disc  and a Crumbled Diary Page
  . Use the diary to add the locations of the two other Disc pieces to your map (You add the specific locations of the last known whereabouts of each piece from the diary to your map.).
The second piece is at Folda. At the island, go down the dungeon then all the way east to the location shown on the map. There, use a Pick or equivalent between the two ornamented tiles covered in debris and go down. Open the Pile of Bones to get a Fragment of an Ancient Disc  .
.

The final piece of the key is at Oramond. For this part, make sure you have the 5 Nails  with you. Go to the north-eastern Minotaur camp, then up the ramp at the center of the camp (here), up another floor, then south, and down twice, until you arrive here. Then, do the following:
- Use the Crate to get Wet Boards
 .
. - Use the Wet Boards, while having the 5 Nails in your inventory, to create a raft. Note that you will not get any new item. With a few nails you manage to build a fragile little raft. This could take you to the smaller cliffs near the shore..
- Use the Sturdy Bollard
 south of you to travel to a small island nearby. You gently push the fragile makeshift raft into the water and make your way to a small cliff over yonder.
 - Use the Dragon Skeleton to receive a Part of an Ancient Disc
 .
.
Finally, with all three pieces gathered, combine any two to craft The Key Intihuatac  .
.
Replacement Key
- Engage in a conversation with Sandomo by using the keyword Lost; he'll then assist you by replacing the lost Piece of an Ancient Disc.
- Collect the Fragment of an Ancient Disc from the Pile of Bones found here.
- Collect Part of an Ancient Disc from the Dragon Skeleton found here.
- Finally, with all three pieces gathered, combine any two to craft The Key Intihuatac.
Ahau
Now you will have access to Iksupan. Go back to the ruins in Tiquanda where you first started and use the Key on the inscriptions to enter the secret City of Gold. Once inside, you can go straight to the fight against their leader, Ahau. To do so, find your way to the third floor and then go all the way north. You'll find an area with lava and some stones on which you can walk on, until you reach a room with two blue flames. The north flame leads to the room with a lever, where you can start the fight with a team of up to 5 players.
Note: On the third floor of Iksupan there are some walkable lava tiles that deal damage proportional to the character's max health. Avoid map-clicking in this area and pay attention to your surroundings.

The fight against Ahau is relatively simple. Initially, you will find him along with two Cursed Apes. Start killing the boss at the middle of the room. It can be trapped by the throne. When it's about to die, it will heal to full health, explode dealing 500 Earth Damage and spawn another Cursed Ape. Furthermore, walkable lava streams on the left and right side of the rooms will appear, which is why you should stand at the center.
Every time Ahau dies, this process will repeat, with the lava area increasing, until its killed a fourth time and doesn't heal back.
Note: If you have obtained Daedal Chisels from Iks Ahpututus, you can use them to break the amphoras in the room at the beginning of the fight. Each Amphora corresponds to one of Ahau's extra life. Since the Chisels are relatively rare and the fight not very complex, you'll won't have them for every fight, however, which is not a problem.
After defeating Ahau for the first time, you'll drop The Living Idol of Tukh  . Use the idol to receive your Ancient Aucar Outfits. To leave Iksupan, there's a shortcut just east of the blue flames, the Slab with a Skull
  will teleport you back to the entrance.
Galthen and the City of Gold Part II


Deeper into the City
After defeating Ahau, begin a conversation with the ghost known as Ahau's Dead Chamberlain, positioned outside the lever room for Ahau. Accept the assistance offered, granting access to utilize the spherical teleporter within the room, transporting you closer to the deep undercity.
Proceed through the corridor, ascending the stairs, which lead to a tomb featuring an eastern aperture. Descending down the hole leads to Iksupan Last Stand, and introduces encounters with new, more formidable creatures compared to those encountered earlier in Iksupan. This initial section serves as an opportunity to confront and acclimate to the increased strength of adversaries. Throughout the entirety of the quest, you'll encounter creatures such as Iks Yapunacs, Mitmah Seers, and Mitmah Scouts in this area and beyond.
Traps to Iksupan Undercity
- Note: The keys obtained in this quest don't have a fixed order and because of that the order of the following sections is just a suggestion. Do them in the order that works better for you.
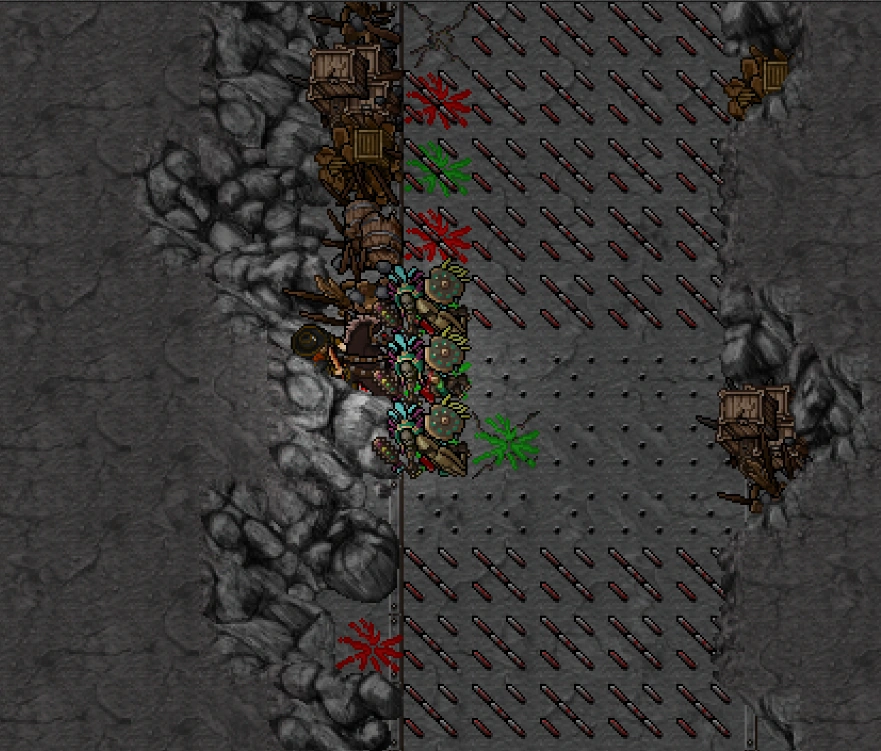


You need to walk around and find your way to corridor leading to the northern area and ladders to a floor downstairs but there's a catch. On your way north there will be some spike traps on the ground. Stepping on them will reduce a counter next to your character's name, and reaching zero will get your teleported back to the beginning, forcing you to try again. Apart from the creatures themselves there are no dangers in reaching 0 in the counter.
Players with the first addon of the Ancient Aucar Outfits will have their counters starting at 99 for this part while other players will start at 3.
Atab
The east key is obtained as a loot from the boss Atab. You can find the boss hereand defeating it for the first time will grant you  The Mitmah East Key.
Here you want to make most damage to the boss as it grants you access to a sealed room located northwest on the same floor.
Note that if you have the first addon of the Ancient Aucar Outfits you might be teleported to an arena to have a more excluded fight with the boss.

Obtaining the Mitmah East Key
Transferred Content
For the second key you basically just need to use a chest but the content of the chest can be transported around, making it slightly more annoying. There are three possible chests: one closer to the underground entrance, one southeast from Atab's arena, and one in the northwest sealed room.
Remembering that a player can only enter the northwest sealed room if it killed Atab and dealt most of the damage to it.
Once you find the right chest, use it and you'll obtain  The Mitmah South Key.
Waterworks Area
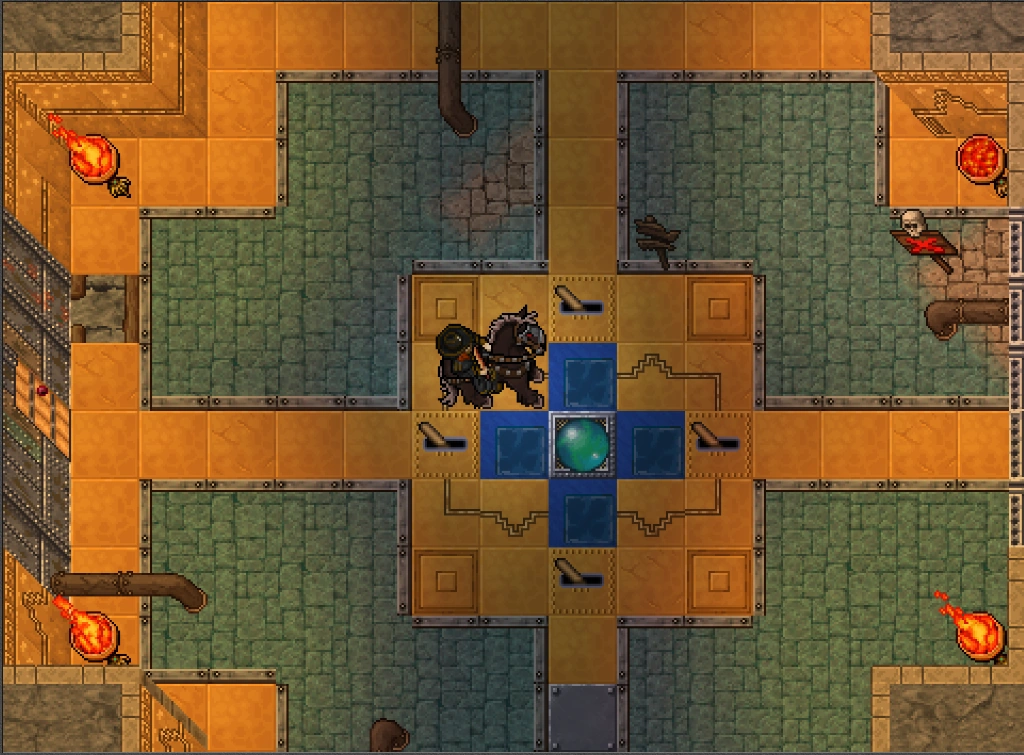


Now walk towards another spheric teleporter that will lead you to the pipelines hub. You can either walk north past the Enormous Statue of Tukh then follow the path east to the teleporter or levitate up for a shorter path (levitate spot is marked with the red up arrow below).
Here you have to repair pipelines by using levers located in different directions. In the main room you also have levers but these are used to grant you permission to use the door in the same direction (for example, if you use the south lever you will be granted access to the south door, etc). There's no specific order and you can always change your option if needed.
Use the lever, run along the corridor of the chosen area and use the lever to repair the pipelines. At total there are four pipelines to be repaired, one in each direction. When you're done you'll receive the following message: All pipelines active, something very large down below rumbles and shifts..
Now you have access to a room hereand by using the ornate case you'll receive  The Mitmah West Key.

Waterworks hub

South pipeline

West pipeline

North pipeline

East pipeline

Obtaining the Mitmah West Key
Sacred Waters
Walk north from the main room and use the stairs to go one floor down. Close to the stairs you will find an empty bucket near a lizard statue. Use an  Ancient Iks Ritual Chalice, very rare loot from Iks Yapunacs, on the bucket and a ritual will get started, summoning multiple Ancient Ugly Monsters and a Ritualwater.
Push the Ritualwater north, accoss the bridge and until one of the two Empty Basins, one located west and the other east. When reaching the goal you'll complete the ancient Iks water ritual, all Ancient Ugly Monsters will transform into Cursed Apes, and be granted access to the walk through the gates located north.
You have 5 minutes to push the Ritualwater to one of the Empty Basins. Not doing so in time will cause you to fail requiring an additional Ancient Iks Ritual Chalice.

Starting the water ritual

Completing the water ritual
Consecrating Doors
Go through the gates and use the barrel hereto obtain  Pilchi with Paint, the first item we need for this part. The second one is
  Ceremonial Brush, rare loot of Mitmah Seers and Mitmah Vanguards.
Your goal is to consecrate 3 doors in the Iksupan area. Both the underground and the levels closer to the entrance to Iksupan have doors, but a good suggestion is checking the corridor just west from the enormous Tukh statue.
After consecrating the doors you have access to a new room and you can get the fourth key,  The Mitmah North Key, in a skeleton corpse (here).
With all four keys continue walking north and use the Monumental Gate to reach the final area.

Obtaining Pilchi with Paint

Example of consecrating a door

Consecrating the third and last door

Obtaining the Mitmah North Key
Mitmah Vanguard
Battle recommendations:

Equip Energy Damage Protection during this fight.
Now you have to face Mitmah Vanguard, the final boss of this part of the quest. This boss is not complex but it causes high damage with its energy UE.
The fight starts with Mitmah Vanguard and some other creatures from the area directly attacking you. It is recommended to take control of the boss and creatures with a knight's Challenge (you can't do anything about the Mitmah Scout as Chivalrous Challenge does not work in boss rooms) and have the other players attack from distance.
As mentioned, the boss main damage come from its energy UE, so make sure to be equipped with as much energy protection you can or feel needed. Do as much damage as you can and pay attention to what the boss is saying as they highlight what mechanic will trigger next:
- FEAR THE CURSE!
This indicates the boss will root players within a long range from the boss followed by a teleport to a random location in the room and an energy UE. The UE causes around 6,000 energy damage, so if you feel like you won't survive it in case the boss teleports close to you, make sure to quickly equip a  Shockwave Amulet and/or protect yourself with
  Energy Ring, Magic Shield and Protector.
The teleports take place in predetermined locations in the room which means some places in the room will always be safe in every fight. Use this information to position yourself and instruct your team for a safer fight.
- NOW TREMBLE!
This indicates another UE is coming up, this time without a root or a random teleport. Once again, analyse your health points and prepare yourself.
 |
 |
Keep on doing damage until the boss is dead. At the end of the fight you'll be rewarded the Museum Goer achievement and the second addon of the Ancient Aucar Outfits.