

Spike Tasks Quest
Help the Gnomes to fight their enemies around The Spike.
The Spike and surroundings
Reward
Dangers
29


Upper Spike Tasks
These tasks are available if your character is in the level range 25-49. Ask Gnomilly on the 2nd floor of the Spike for missions. Receive all missions (pacifiers, release, track, kill), and then leave the area using the large crystal teleporter.
Ghost Pacifiers
Having received the pacifiers tasks from Gnomilly, search the first 3 floors of the Spike for Ghost Pacifiers. Use the Tuning Fork on the ghost pacifiers 7 times. You can use the same pacifier once every 2 minutes.
Ghost Pacifier can be seen marked with a on the following maps:
| Floor 1 | Floor 2 | Floor 3 |
Turn in the task for 1000 experience and 1 fame point.
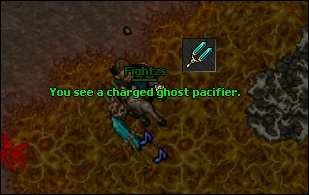
Angry Spirits
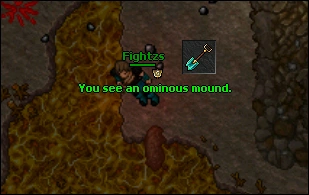
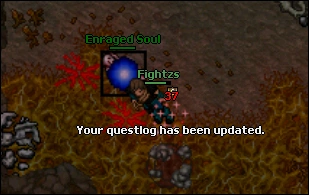
Having received the release task from Gnomilly, search the first 3 floors for Ominous Mounds. Use the Spirit Shovel on the mounds until an Enraged Soul spawns, and kill it. You can use the same mound after 2 minutes.
If you fail, you will receive one of these messages instead:
- You've found nothing special — Nothing happens.
- You unearthed some not-so-death creature — Zombie or Demon Skeleton spawns.
- Your crude digging has angered some ancient ghost — Ghost spawns.
Ominous Mound can be seen marked with a on the following maps:
| Floor 1 | Floor 2 | Floor 3 |
Turn in the task for 1000 experience and 1 fame point.
Malevolent Presence
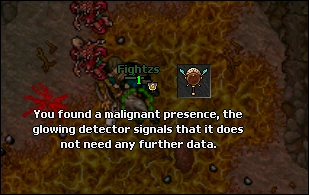
Having received the track task from Gnomilly, use the Ghost Detector on the 3 floors to see which directions to go. This spot may be different for everyone doing the quest. When you are in the correct spot, use the Ghost Detector again. Note that the Ghost Detector will only ever say northeast, northwest, southeast, and southwest.
Approximate possible locations of the Malevolent Presences:
| Floor 1 | Floor 2 | Floor 3 |
Turn in the task for 1000 experience and 1 fame point.
Killing Demon Skeletons
Having received the kill task from Gnomilly, enter the caves and kill 7 Demon Skeletons.
Turn in the task for 1000 experience and 1 fame point.
Middle Spike Tasks
These missions are available if you are in the level range 50-79. Receive all the missions from Gnombold on the 4th floor.
It is strongly recommended for mages to bring a Terra Set and use Fire attacks because all of the monsters in this division deal earth damage and most are weak to fire. Be very careful of the Crystalcrushers, the hardest monsters in the division.
Mages are the best vocation to do those tasks, if you aren't a mage then ask a mage to assist you. There are alot of monsters at the same time. Some of those monsters are strong to physical damage, this makes it very annoying for a EK or RP to do those tasks solo.
Map of the first floor:
Nest= ; Mushroom=
 ; Monolith=
Destroy Nests
Having received the nests task, go to the south side of the inner Spike (the safe zone) and step between the crystal structures to disguise as a Mutated Bat. Now enter the cave and search for nests. You can only use nests when disguised,you need to destroy 8 nests. A nest will "repair" itself after one to two minutes and can then be used again.
Nests can be found at the
Turn in the task for 2000 experience and 1 fame point.
Fertilising Mushrooms
Having received the fertilise task, search the caves for large mushrooms. Use the fertiliser on the mushrooms. You must do this 4 times on different mushrooms, it isn't possible to fertilise the same mushroom twice. This counts per player, so both you and your friend can fertilise the same mushroom.
Mushrooms can be found at the
Turn in the task for 2000 experience and 1 fame point.
Geomantic Charges
For this task you need to find magnetic monolithes and use the Lodestone on the charged monolith. Using it once, gives you a Partially Charged Lodestone. Using it on two charged monolithes, gives you a Highly Charged Lodestone. On the third use, you will get the message: You have charged you body with geomantic energy and can report about it.
Monolithes will recharge themself in around one to two minutes and can be used again then. It is possible that you get teleported to a random place in the cave!
A Monolith can be found at the blue question mark .
Killing Crystal Crushers
Having received the kill task, enter the caves and kill 7 Crystalcrushers.
Turn in the task for 2000 experience and 1 fame point.
Lower Spike Tasks
These tasks can be done by players at level 80 or higher. To receive the tasks, talk to Gnomargery on the -7th floor.
Parcel Delivery
You will receive 4 Gnomish Supplies. Enter the caves and find four of the five outposts. Give each of them the gnomish supplies.
These are the approximate locations:
Gnome Troopers can be seen marked with a on the following maps:
| Floor 6 | Floor 7 | Floor 8 |
Turn in the task for 3500 experience and 1 fame point.
Undercover Contacts
Having received the undercover task, enter the caves and find at least three out of nine undercover gnomish agents. The NPCs are disguised as monsters and have names like "A Vulcongra", "A Nightmare Scion". When you find any of them, say hi to him to receive his report. You must talk to three agents. After doing so, you may report your mission.
The approximate location of the undercover gnomish agents can be seen marked with a on the following maps:
| Floor 6 | Floor 7 | Floor 8 |
Turn in the task for 3500 experience and 1 fame point.
Temperature Gauging
Having received the temperature task, enter the caves and search for lava pools. The hot spot is the same for each player, but changes each day with Server Save and it can be on any of the 3 Lower Spike floors. Use the Thermometer to check for a hotspot near the lava pools. When you receive the message Whew! That was that hot, it melted the thermometer! At least you've found the hot spot!, report back to Gnomargery.
All 9 lava pools can be seen as orange on the following maps:
| Floor 6 | Floor 7 | Floor 8 |
Turn in the task for 3500 experience and 1 fame point.
Drillworm Killing
Having received the kill task, enter the caves to find and kill 7 Drillworms. You can also go to the Drillworm Caves outside of the The Spike to complete this task.
Turn in the task for 3500 experience and 1 fame point.
Rewards
See the Cave Explorer Outfits Quest.